Before You Scan
Awesome Technology
For you and your patients
Welcome to the world of 3DISC
Useful Tips
-
Make sure the patient, scanner and computer are ideally placed, so that the patient is comfortable, the screen clearly visible and the keyboard or touch-screen accessible while scanning.

-
Put the patient at ease, by describing the restoration work you plan to carry out.

-
To scan the maxillary arch, rotate tip to face up
To make the scanning process more comfortable for maxillary scans, remove the tip by pressing the button located under the handpiece and rotate the scanner tip 180 degrees.
Make sure the tip locks correctly into place before starting to scan.
-
- Use air to keep preps dry
- Use hemostatic agents - retraction paste, impregnated cord, etc.
- Use the double-cord technique
-
- Moving the handpiece too fast will interrupt the scanning process
- The scanner needs a reference point to resume scanning

-
Do not hesitate to perform a full arch scan
Full arch scans provide:
- More information to your lab
- Greater bite accuracy
- Complete digital records


-
Take care when using retractors
Caution is needed when using different retraction techniques - retractors can cause some issues in anterior area and at the junction of cheek and jaw tissue. Retractors stretch the soft tissue which means on bite step when there is no retraction the soft tissue has changed from the upper and lower scans.

- Take care when using a dental mirror
Caution is needed when using the back of the mirror for retracting the cheeks as this can get captured in images and lead to slowing down of the scan, as the elements are not native in the scene.
- Make sure that contact points are captured...
Scan Live View

While scanning, the Live View window in the lower left of the screen displays what the Heron™ IOS Scanner is actually seeing. The digital 3D model is displayed in the middle of the screen.
-
If the scanner loses connection with the reconstructed image, the Live View perimeter frame will be displayed in red: return the scanner tip to an already scanned section to resume the scan.
-
If Use Sound Guidance is enabled in Sound Settings, the system will indicate an interrupted scan by going silent.
You can select Live View options in the 3D Settings Menu.
For information, visit 3D Settings Options
When Scanning...
Scan Tips

- Keep close to teeth (recommended distance from tip to tooth is 0-12 mm)
- Scan slowly and smoothly, to avoid interrupting the 3D reconstruction (minimum 1 second per tooth)
- Keep teeth in center of the field of view
- Angle the scanner tip to take in as much gingiva as possible (bite alignment is based on gingival data)
- Avoid extraneous items (lips, cheeks, tongues, gloves, etc.)
- Do not hesitate to reset scan if necessary
Scan Memory Use
Over-scanning may use up available memory space. When the warning “Scan memory is running low please conclude scan” is displayed on the screen, no more High Resolution frames will be added to the scan after this point.
Important Notices
Before You Scan, Make Sure That...

- The computer on which the 3DiscClinic™ software is installed is connected to an External Power Source.
- Your 3Disc™ scanner is Correctly Connected to the computer via the USB 3.0 cable and the 3DiscClinic™ software is running.
If using a laptop computer, make sure the power supply is connected to a power outlet and not running on battery power.
- Failure to do so will mean that the scanner will not have sufficient power to produce images.
- On laptop computers, battery settings in Windows should be configured to high performance mode only, with no battery saving option (Settings/System/Battery).
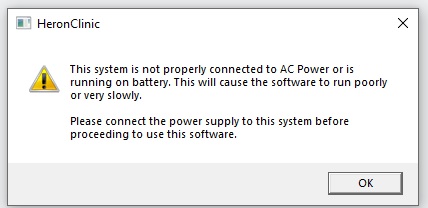
IMPORTANT: Connect to Power Supply before you Scan!
IMPORTANT: Connect to Power Supply before Scanning!
If your laptop computer is not properly connected to a power outlet, the message below is displayed
In this case, please connect your laptop to the power supply before proceeding to scan!.

Enjoy Scanning with your 3DISC™ IOS Solution!
© 3DISC 2025